How to Make a Basic Cushion
- By Alyssa
- 45 minutes
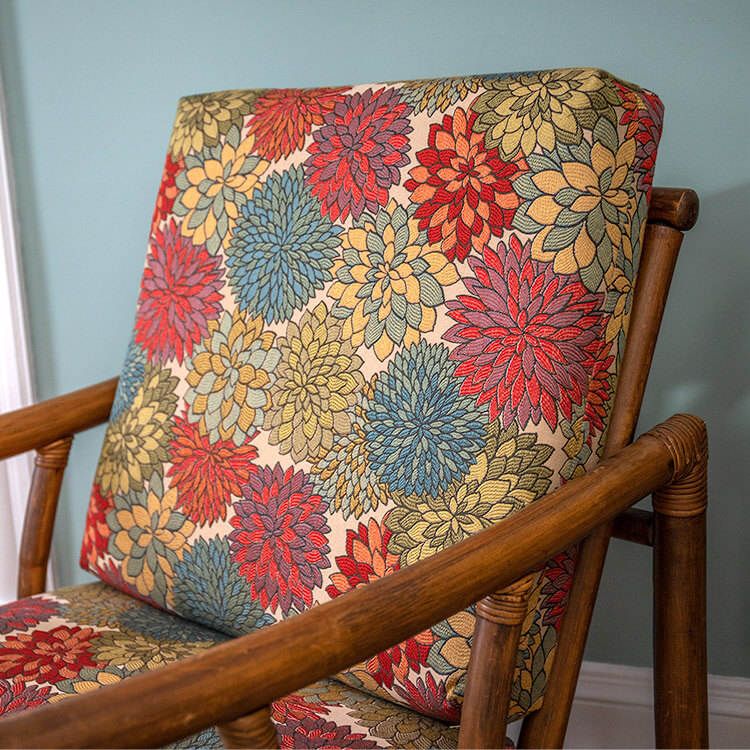
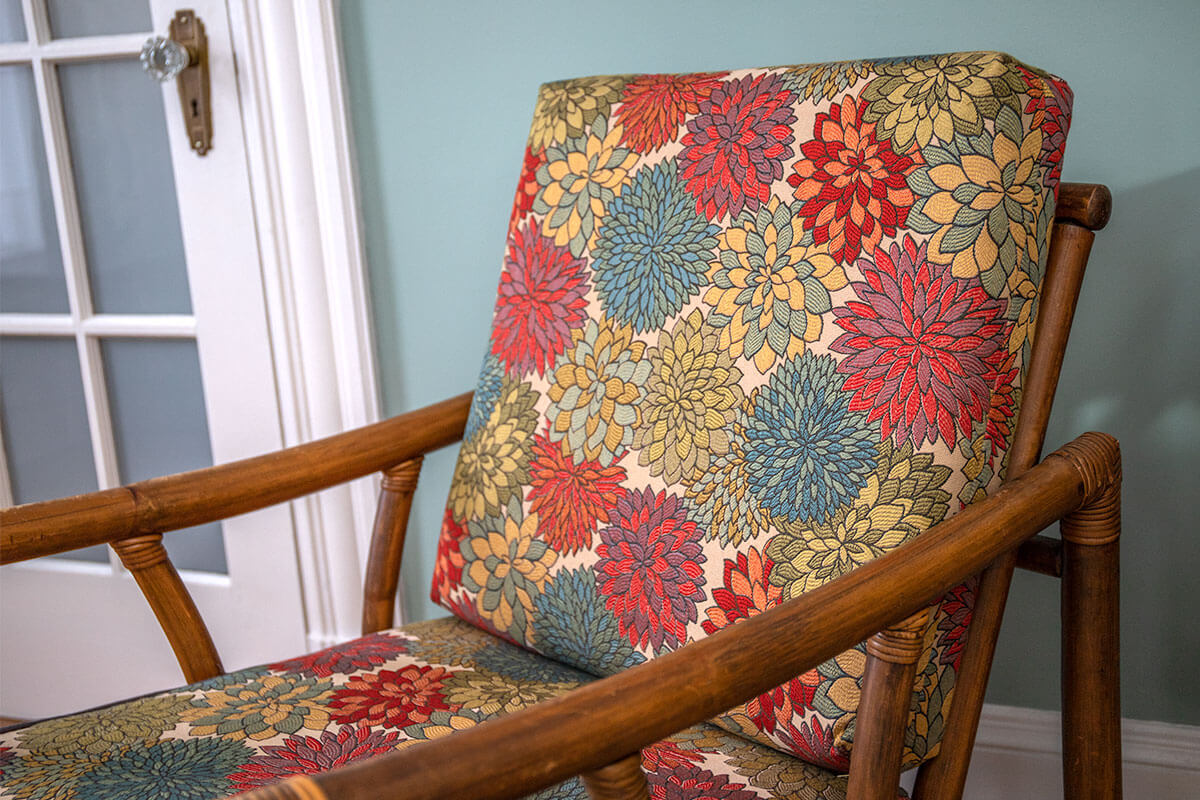
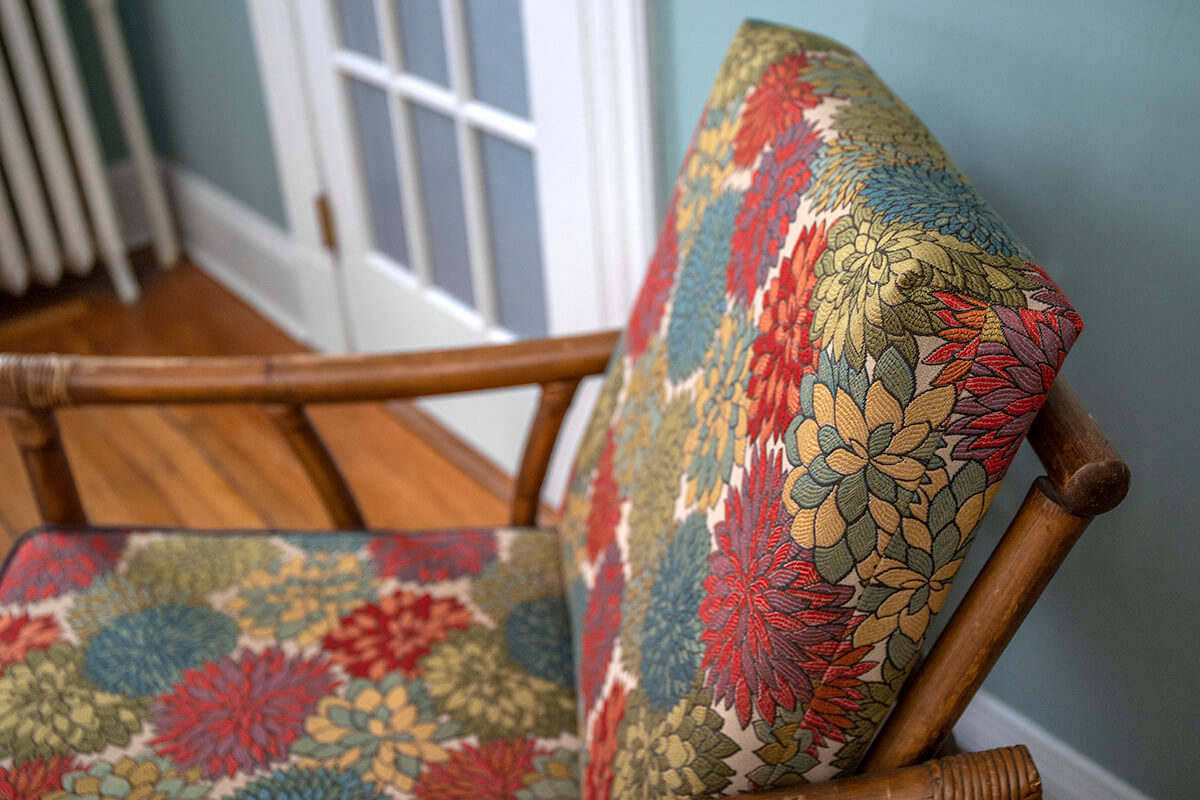
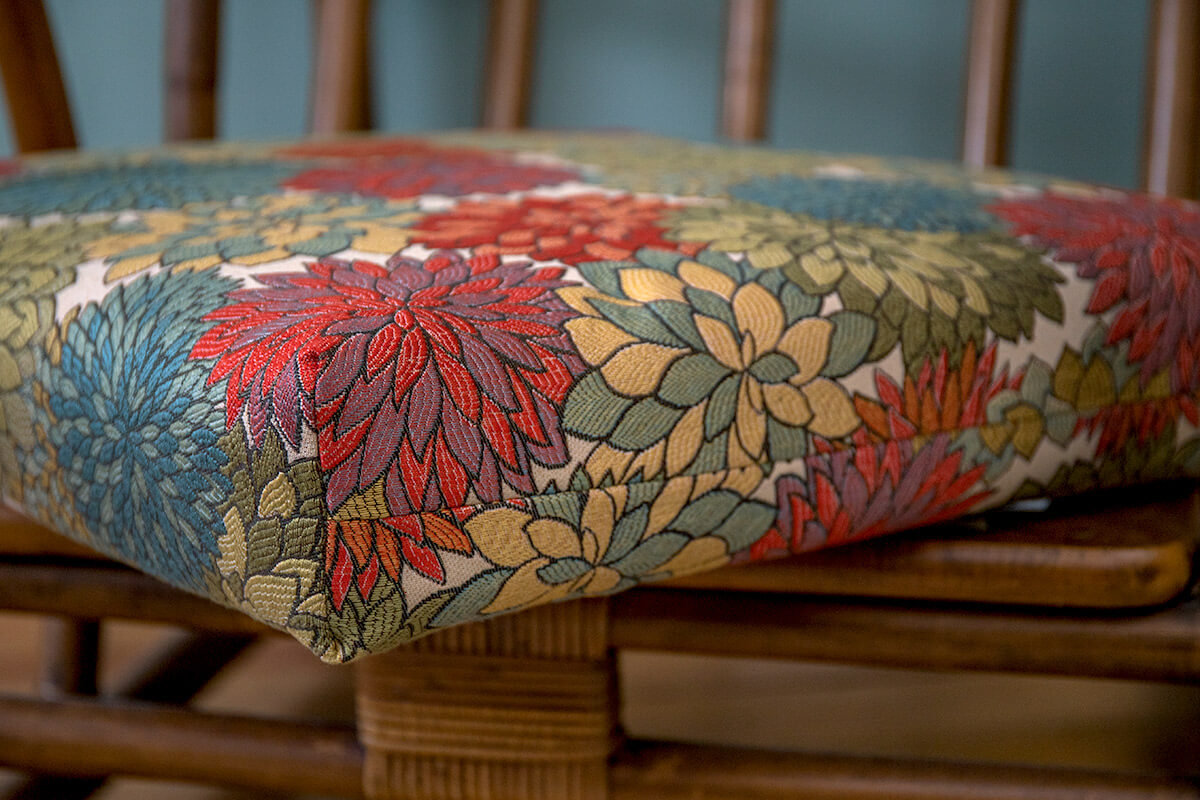
When redoing a chair we bought at the Brimfield Flea Market, I wanted to make a really simple cushion for the back rest of the seat. I knew I wanted to use this gorgeous floral upholstery fabric and I was going to make a box cushion for the bottom of the seat, but I was really unsure what I was going to do for the back.
My best description of this style is a knife edge cushion but I really could not find anywhere on the internet that had this exact style that I came up with, even though I have seen this style before on furniture in stores.
I am naming it the basic cushion, because you only need to cut one piece of fabric to make it. You can make yours with a zipper, or you can leave an opening in that space and use an invisible stitch to sew it closed. I went with the zipper, because I wanted to be able to take the cover off. And here’s how you can make your own.
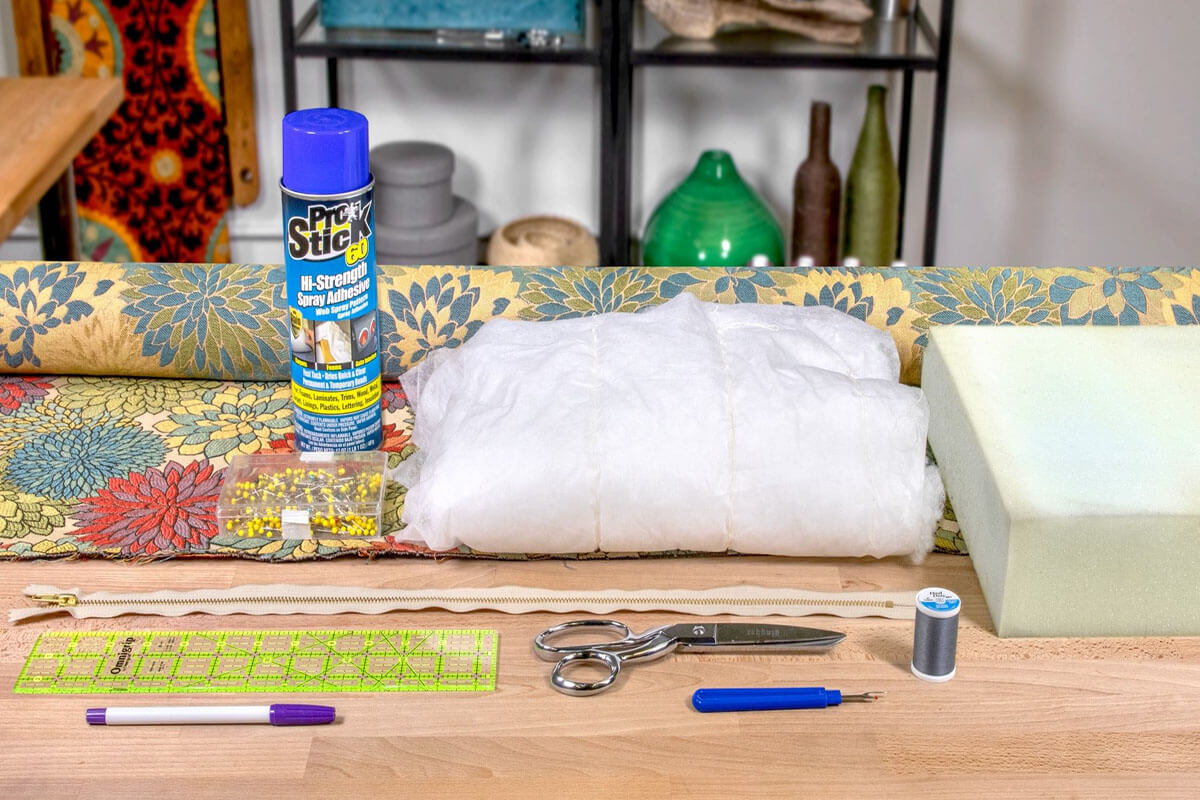
Materials
- Decor Fabric
- Upholstery Foam
- Serrated or Electric Knife
- Dacron Padding
- An Upholstery Zipper
- A Seam Ripper
- A Ruler
- Pins or Clips
- Thread
- Scissors
- Fabric Marker
- Foam Spray Adhesive
- A Sewing Machine with a Zipper Foot
Related Products
-
 3 x 30 x 54 High Density Upholstery Foam
-
 Cushion Dacron Wrap
-
 Knife Edge Dressmaker's Shears - 8"
-
 Deluxe Seam Ripper
-
 Dual Duty XP Thread - Nugrey, 250 Yards
-
 24" YKK Upholstery Zipper - #5 (Closed End)
-
 Dual Tipped Marking Pen - Blue & Purple
-
 Pro Stick 60 Hi-Strength Web Spray Adhesive - 17 Oz
-
 500 Quilting Pins - Size 28
-
 Quilter's Ruler - 6" x 24"
-
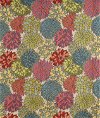 Mumsford Carnival
Video
Instructions
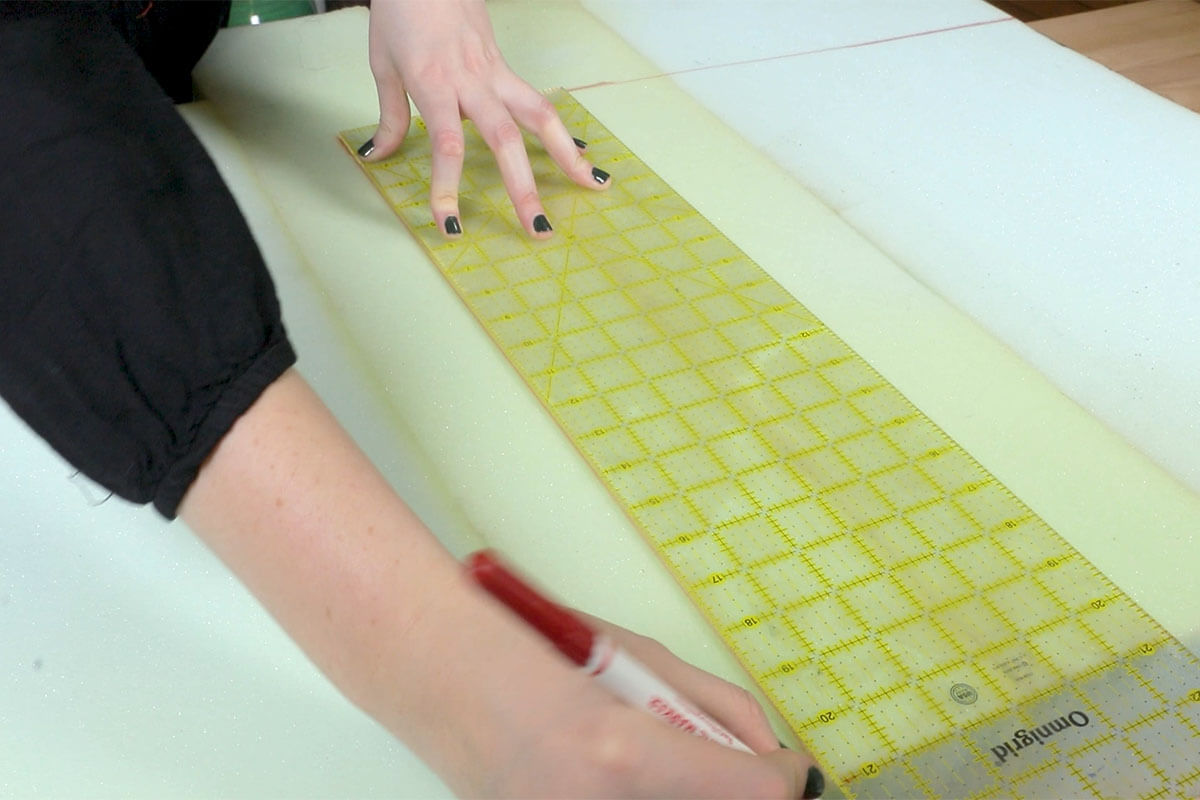
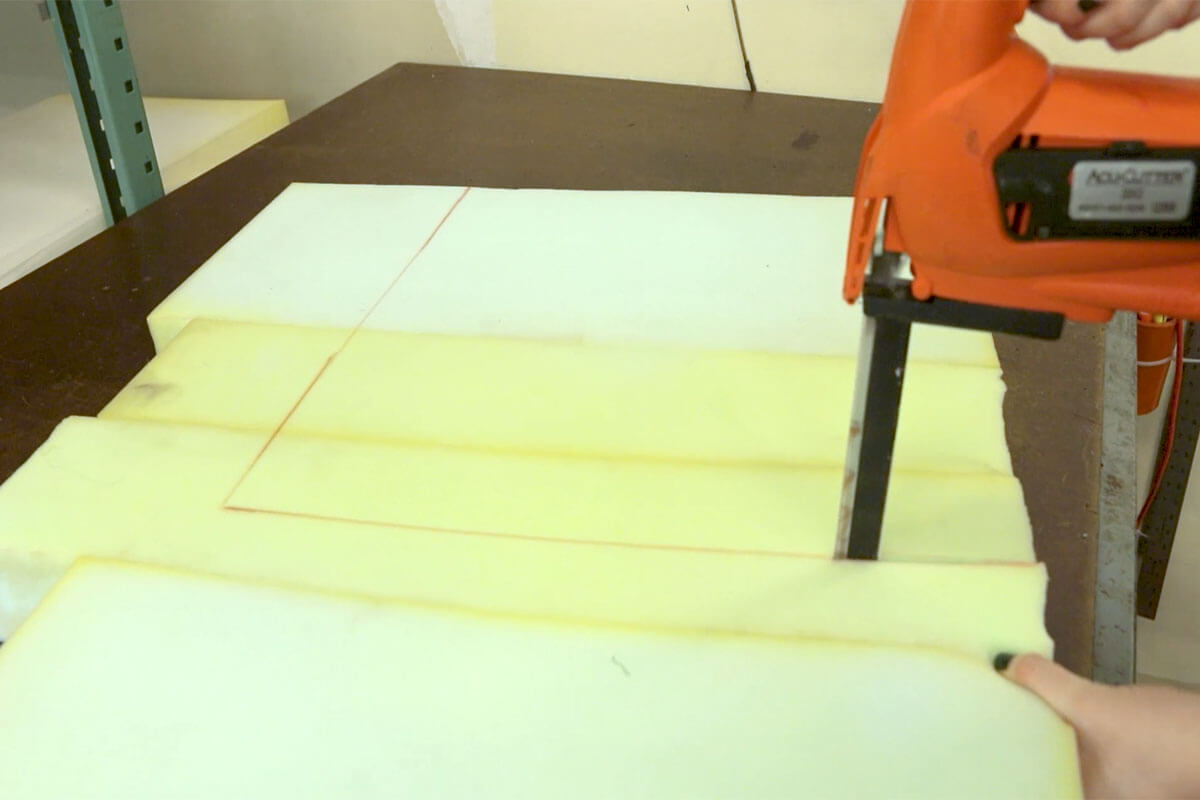
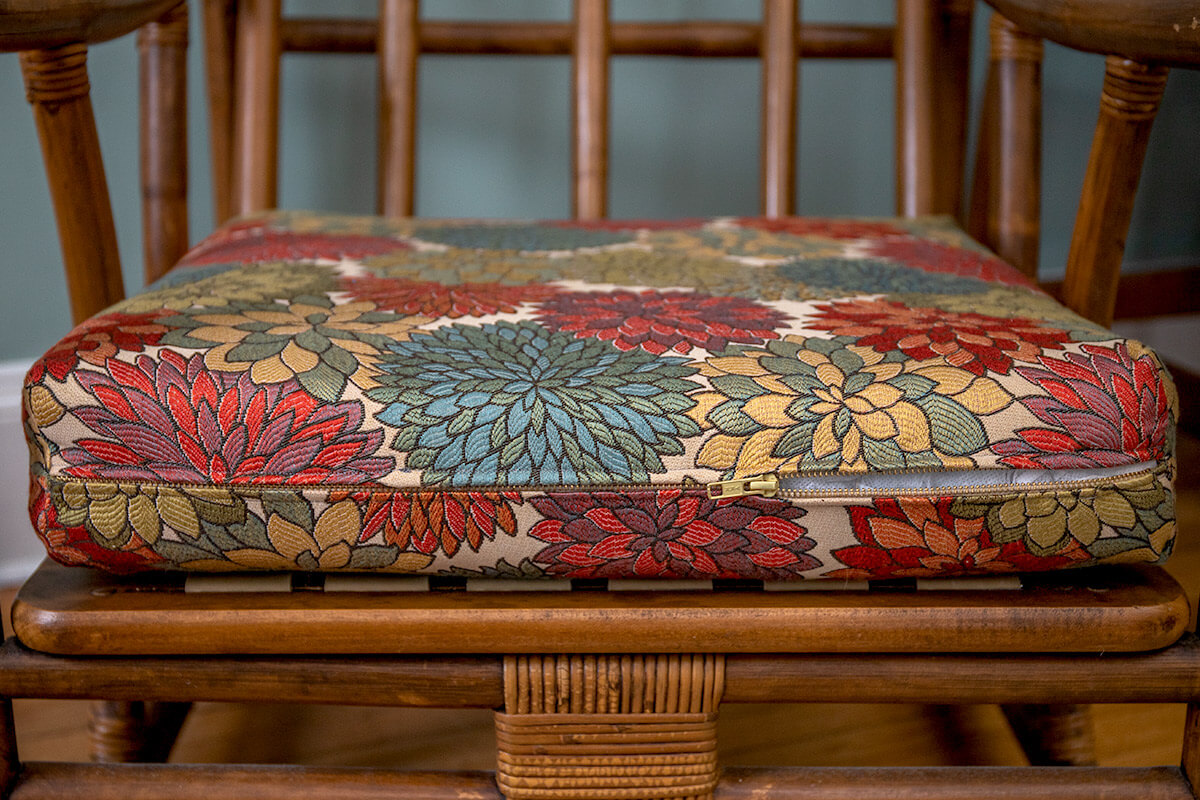
Step 1: Cut the Foam & Padding
The cushion I will be making is 21 ” x 21” x 3”
First, decide the size you want your cushion to be.
Mark a piece of foam to your dimensions and use an electric or serrated knife to cut it to shape.
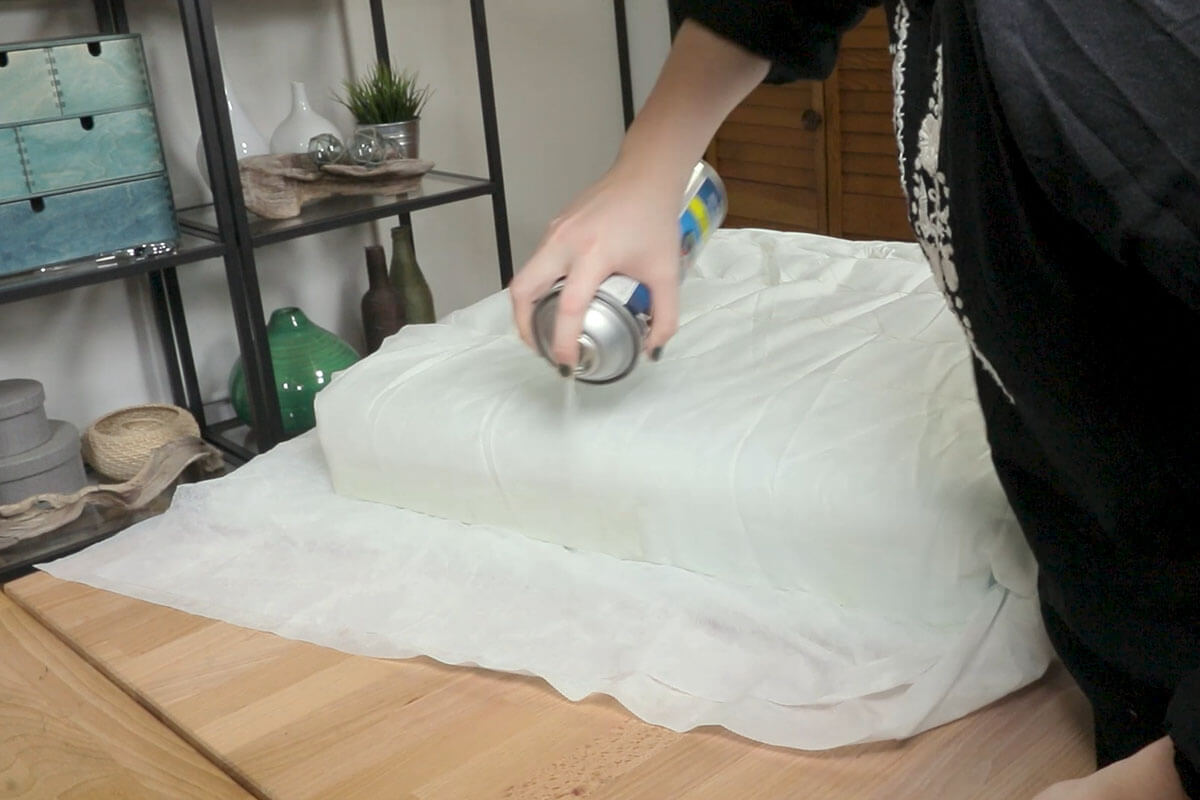
Using spray adhesive, attach Dacron cushion wrap to your foam. Don’t allow any spots to overlap or you might be able to feel the lumps through the upholstery fabric.
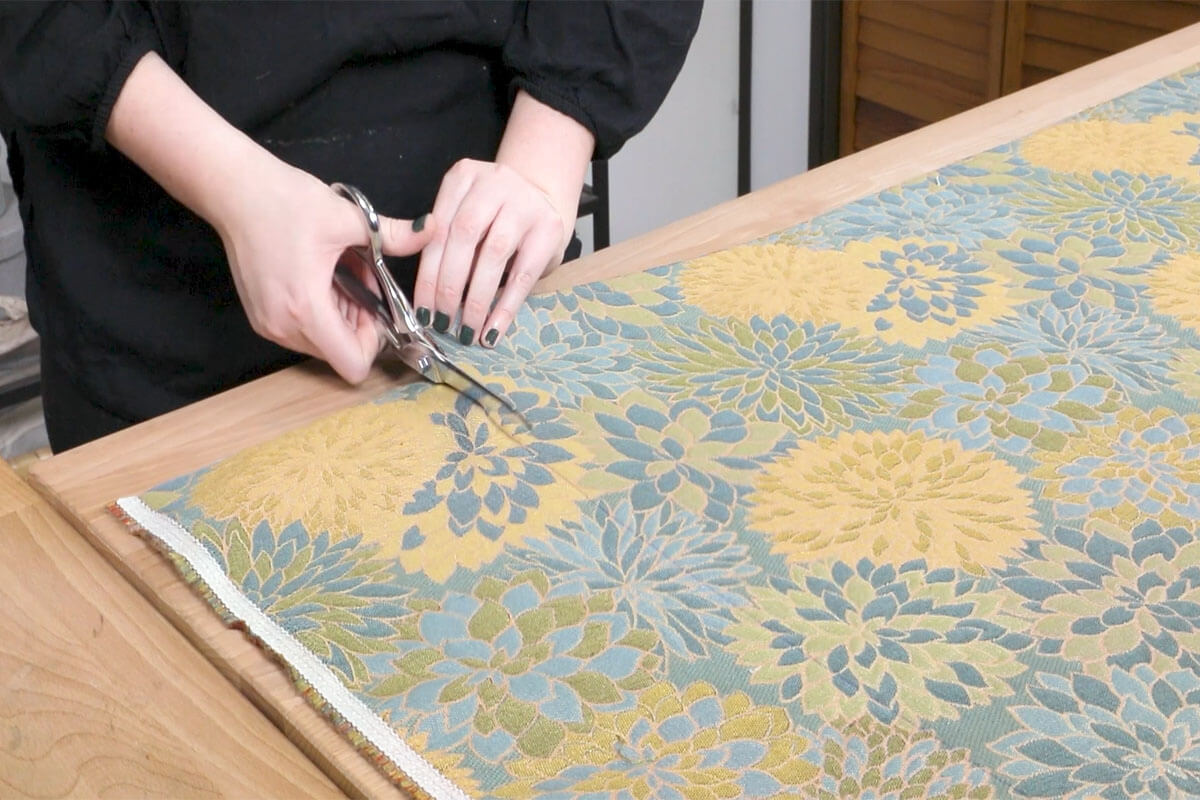
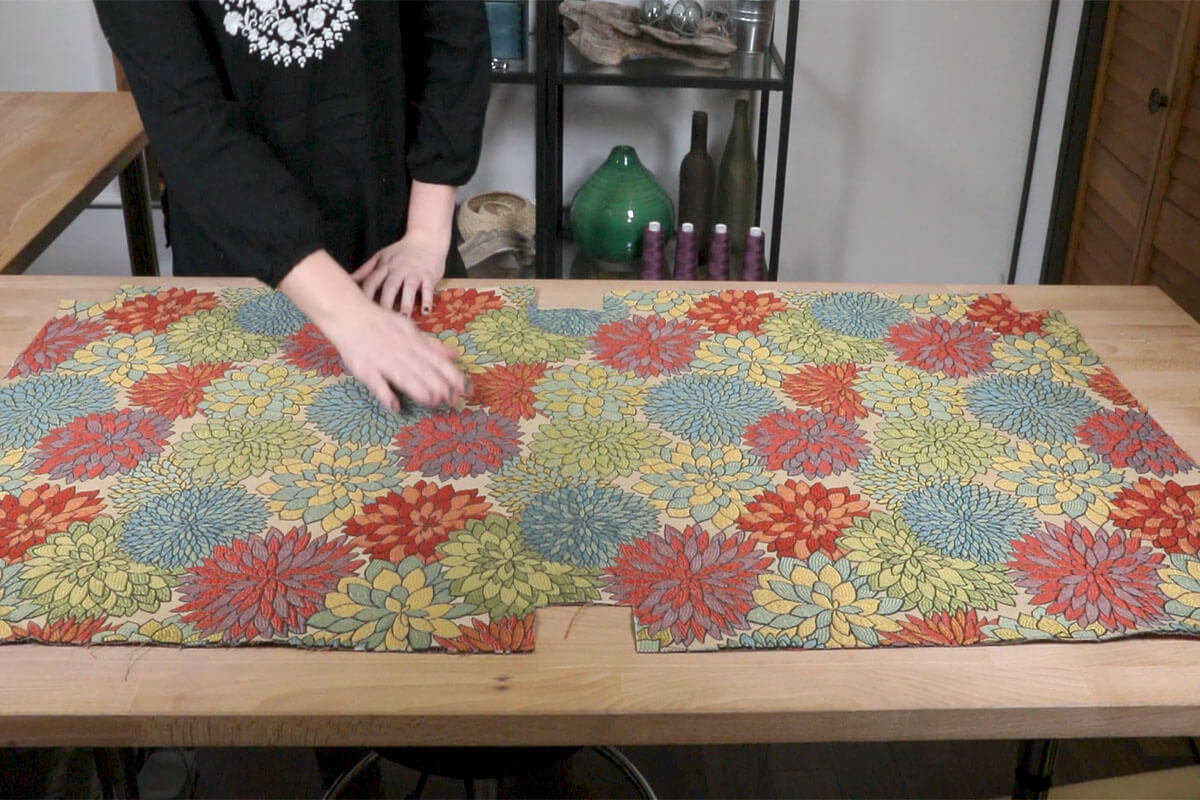
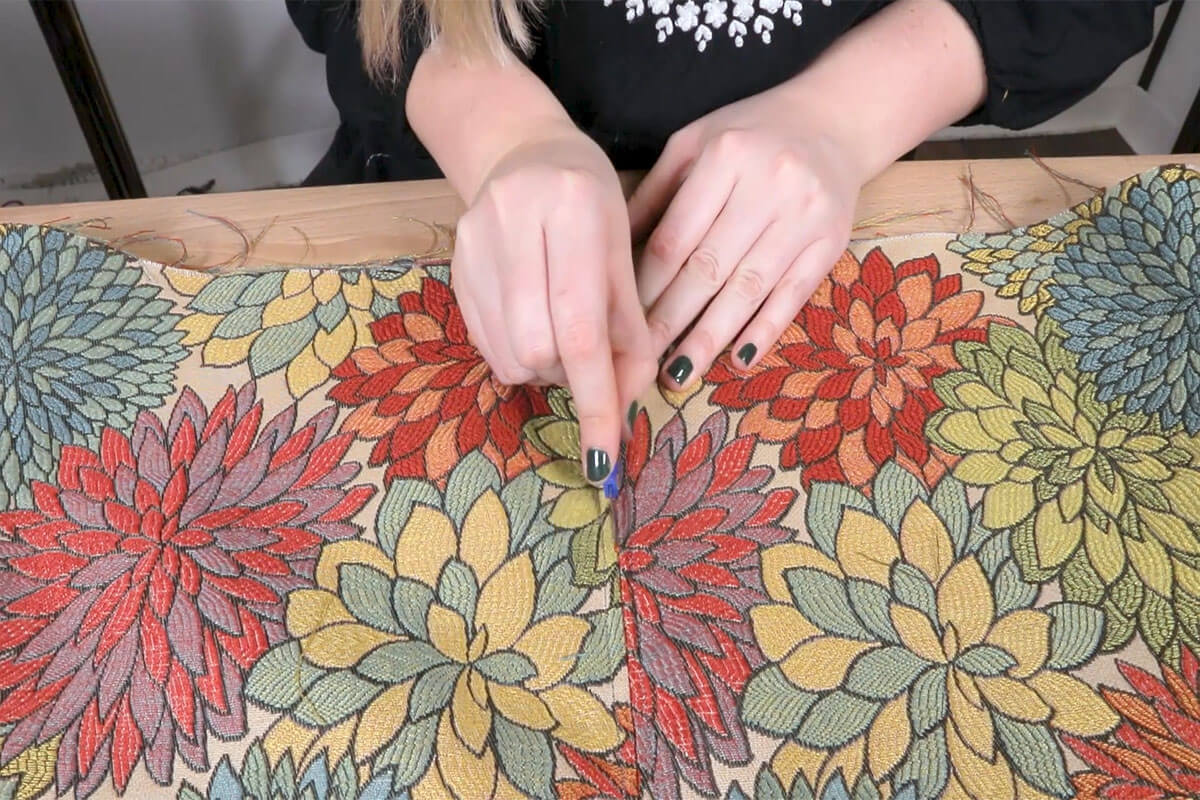
Step 2: Measure & Cut the Fabric
Now you will want to cut out your piece of fabric. To determine the size you will want to use the following equations.
width = width + height + 1” SA
length = (length x 2) + (height x 2) + 1” SA
gussets (square cutout size) = (height / 2) + ½” except for on folded edge, don’t add ½”
EDIT! We now suggest subtracting the ½” for the gusset cutouts. So this is the updated information:
gussets (square cutout size) = (height / 2) except for on folded edge, subtract ½”
(When sewing the diagonal line for the gussets, the seam allowance makes the seam longer, which we did not account for originally and made the corners too tall. The cushion wrap disguised this so we did not notice until this was pointed out in the Youtube comments!)
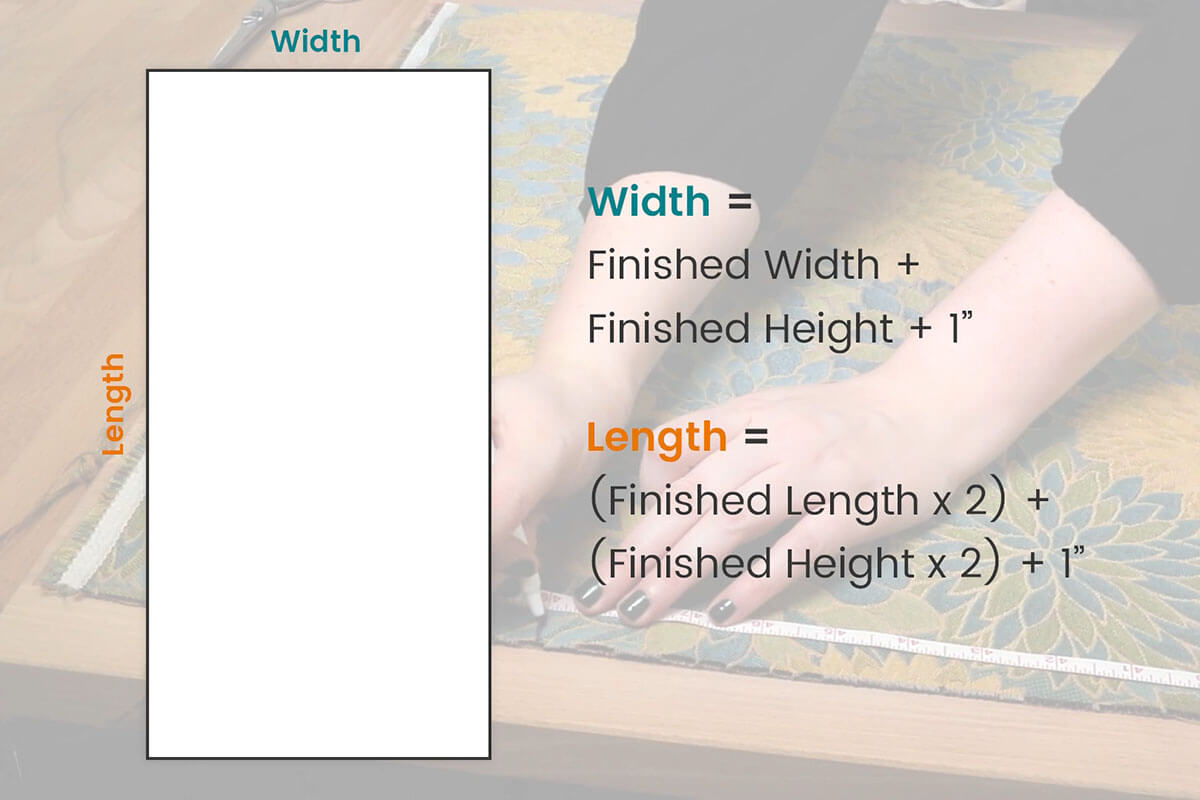
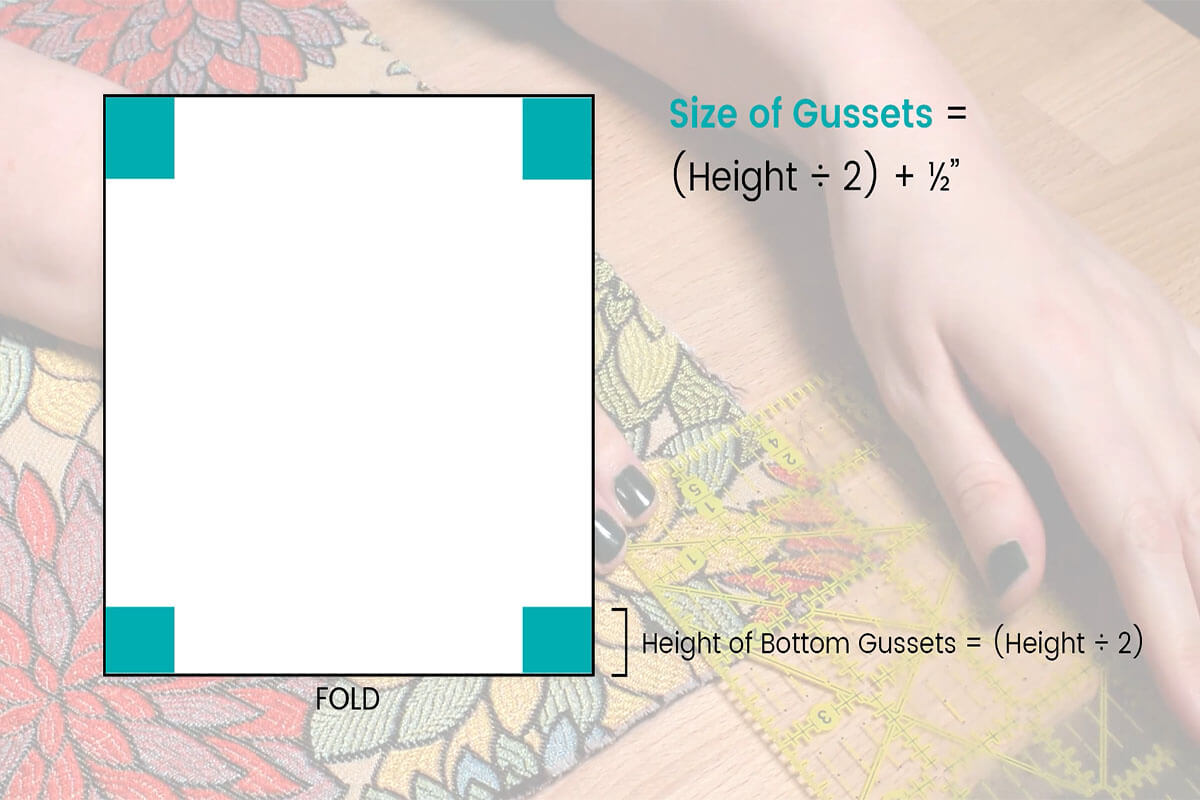
So, my piece of fabric will be 25”x 49” with 2” gussets on the sides and 1.5″ x 2” gussets in the middle. (With our suggested update the gussets would be 1.5″ and 1″ x 1.5″)
Usually when you make cushions and pillows you want the cover to be slightly smaller than your form, by 1 or two inches, this is so the cushion looks nice and full. In this case we are making the cover the same size as the foam because we added the Dacron padding so that will give it that extra oomph we are looking for.
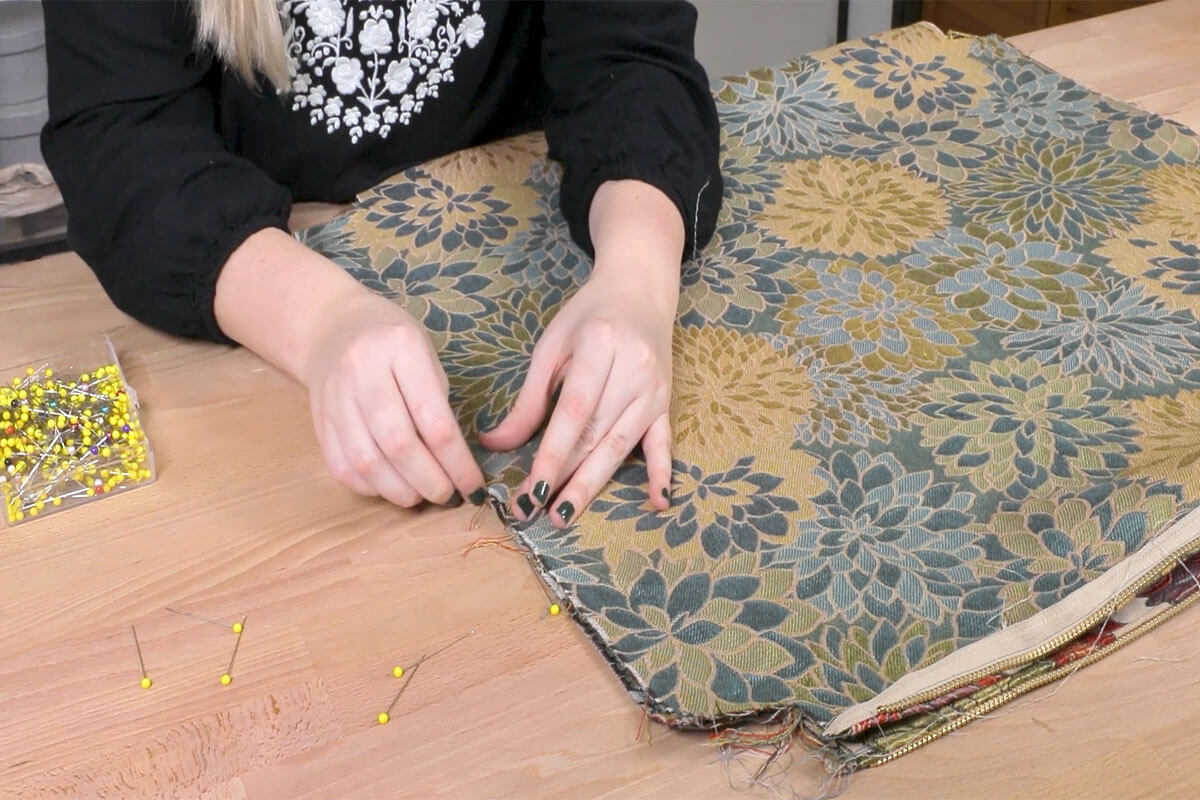
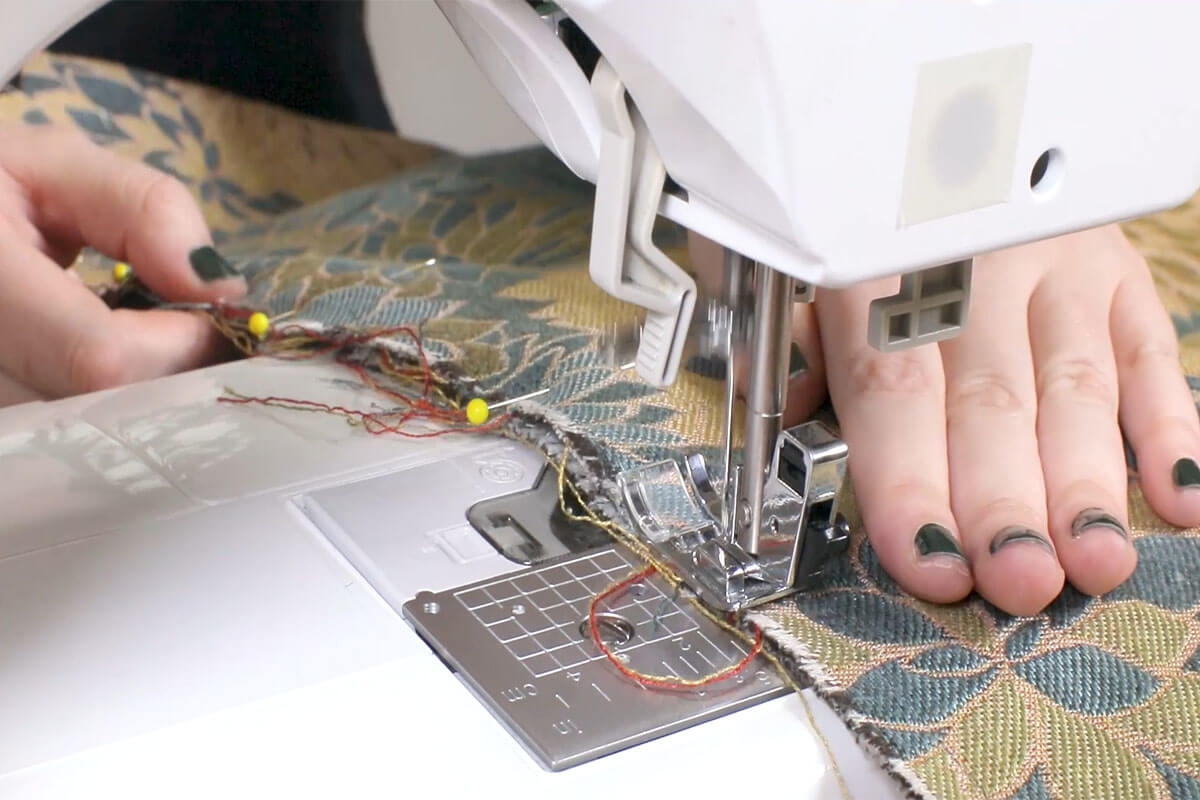
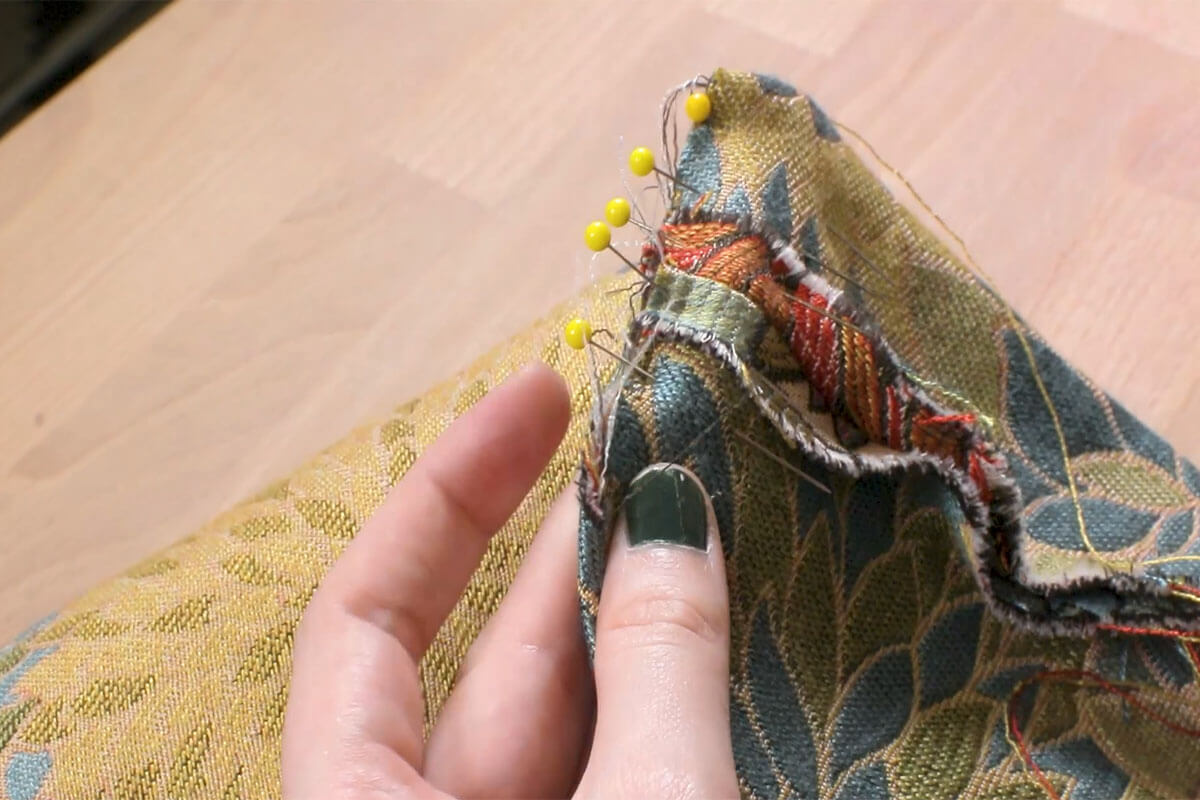
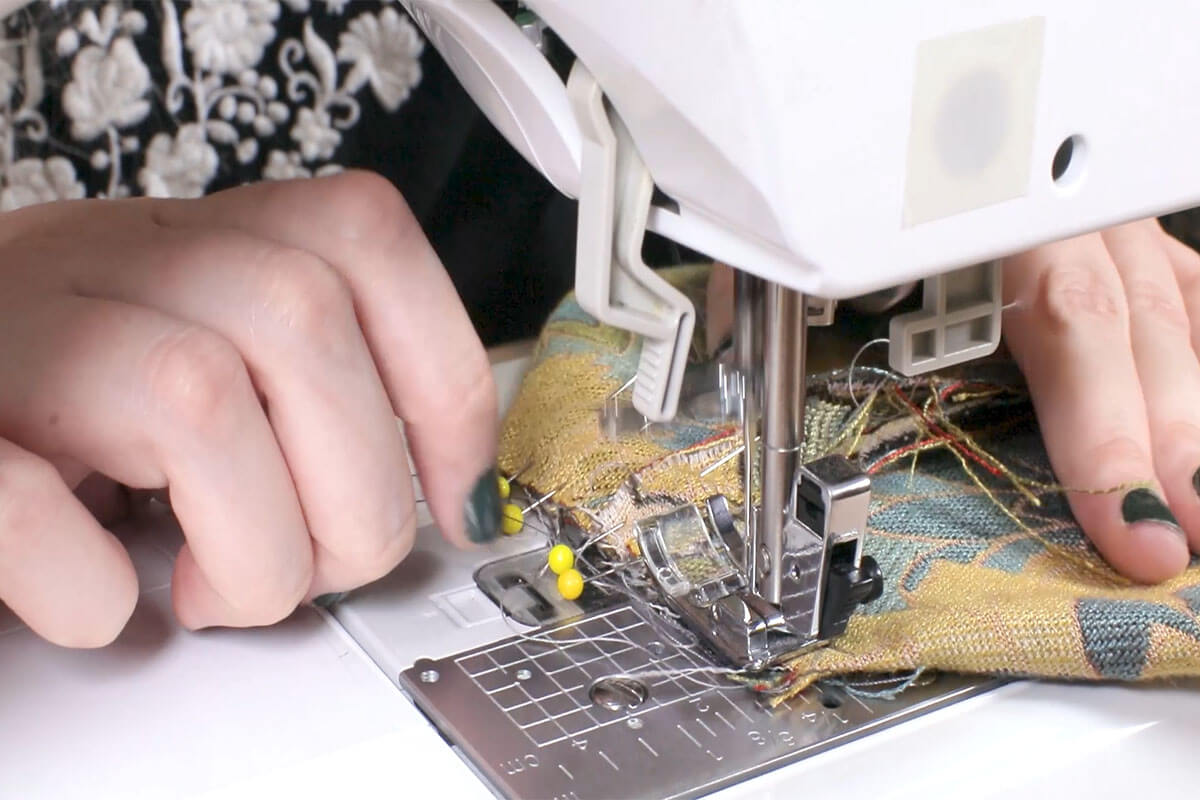
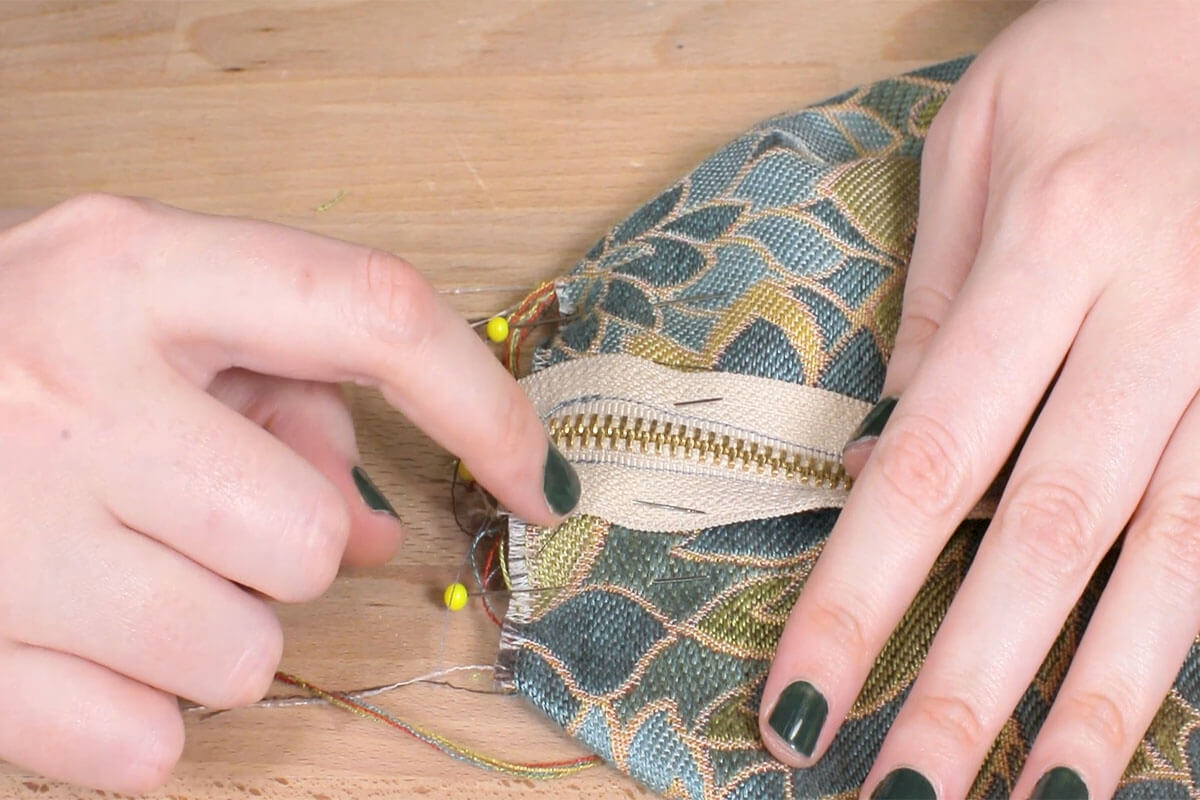
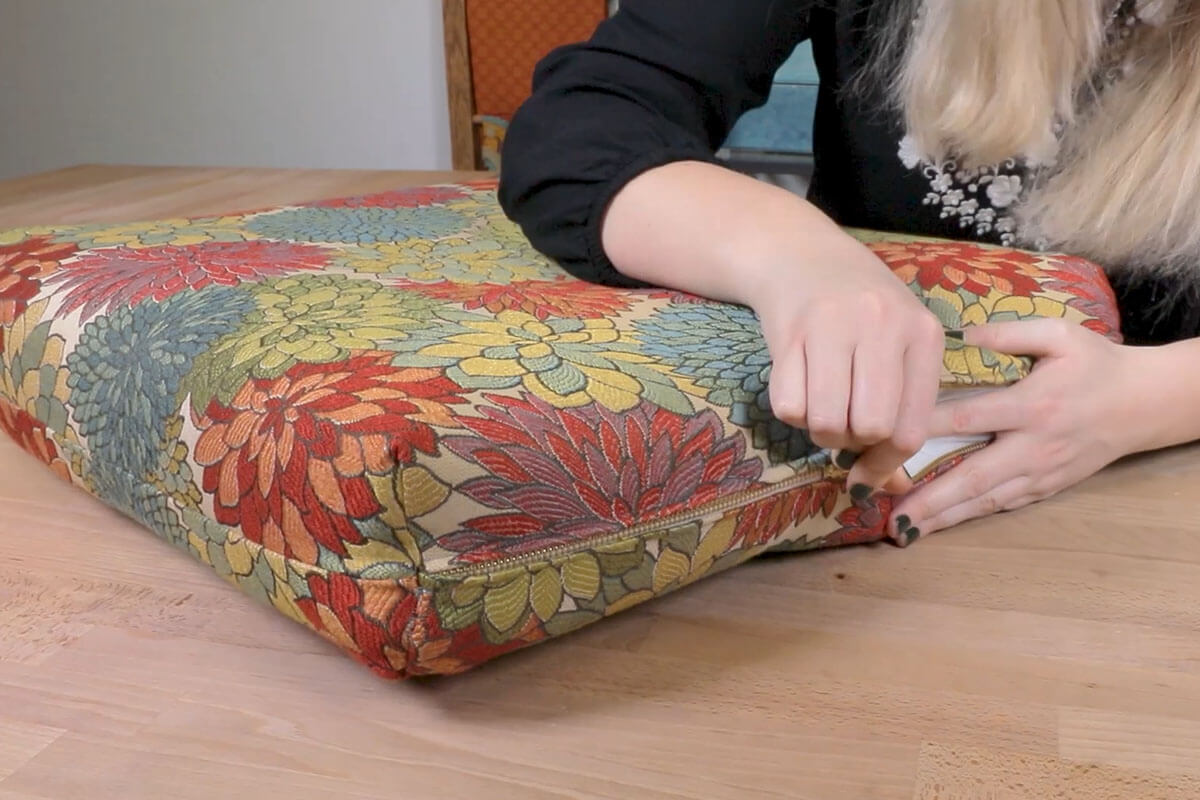
Step 3: Sew the Zipper
Sew the short sides together with right sides facing using the longest stitch length your machine will allow.
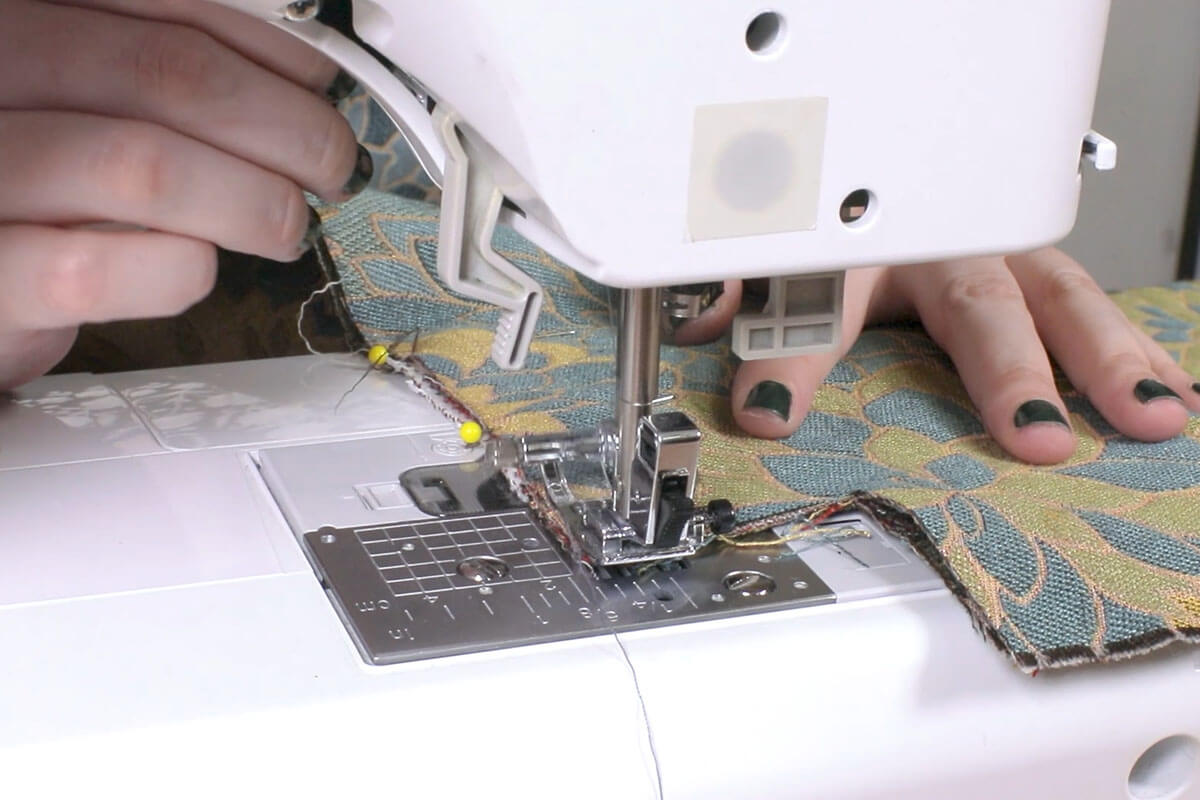
Iron the seam open and lay the zipper face down so it’s centered on the seam and pin.
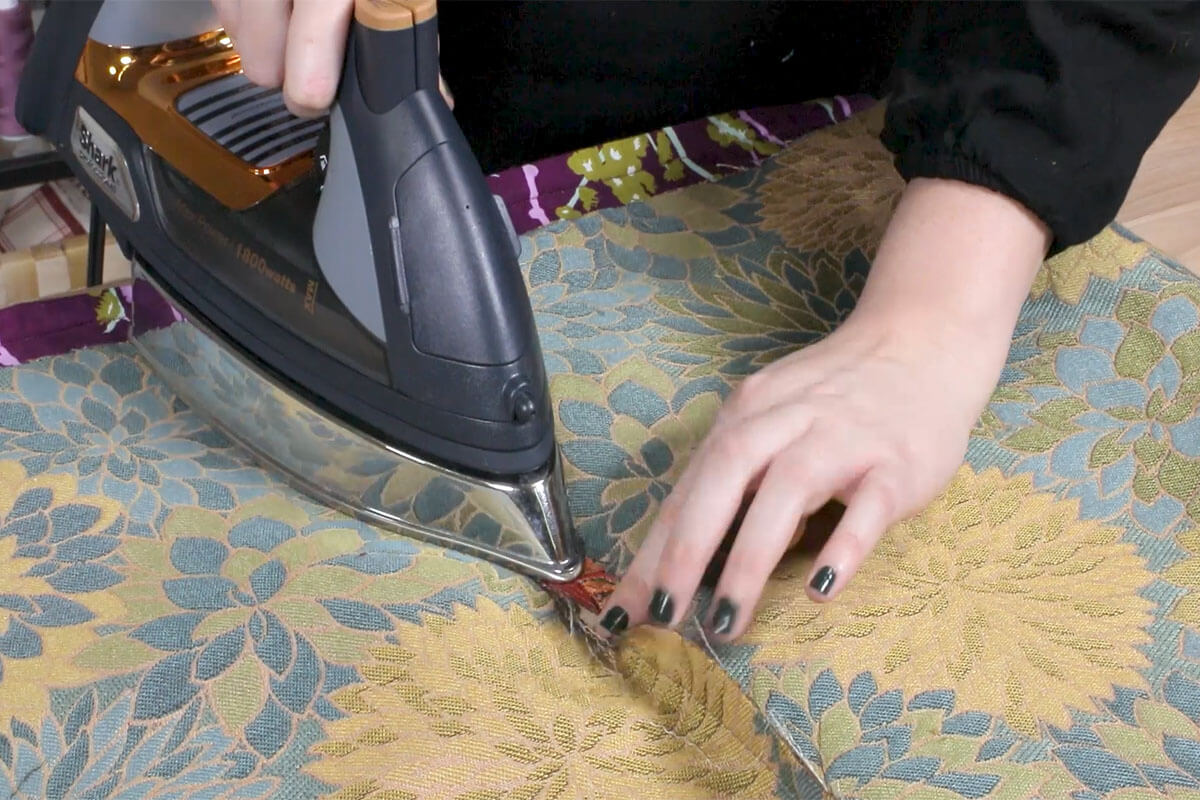
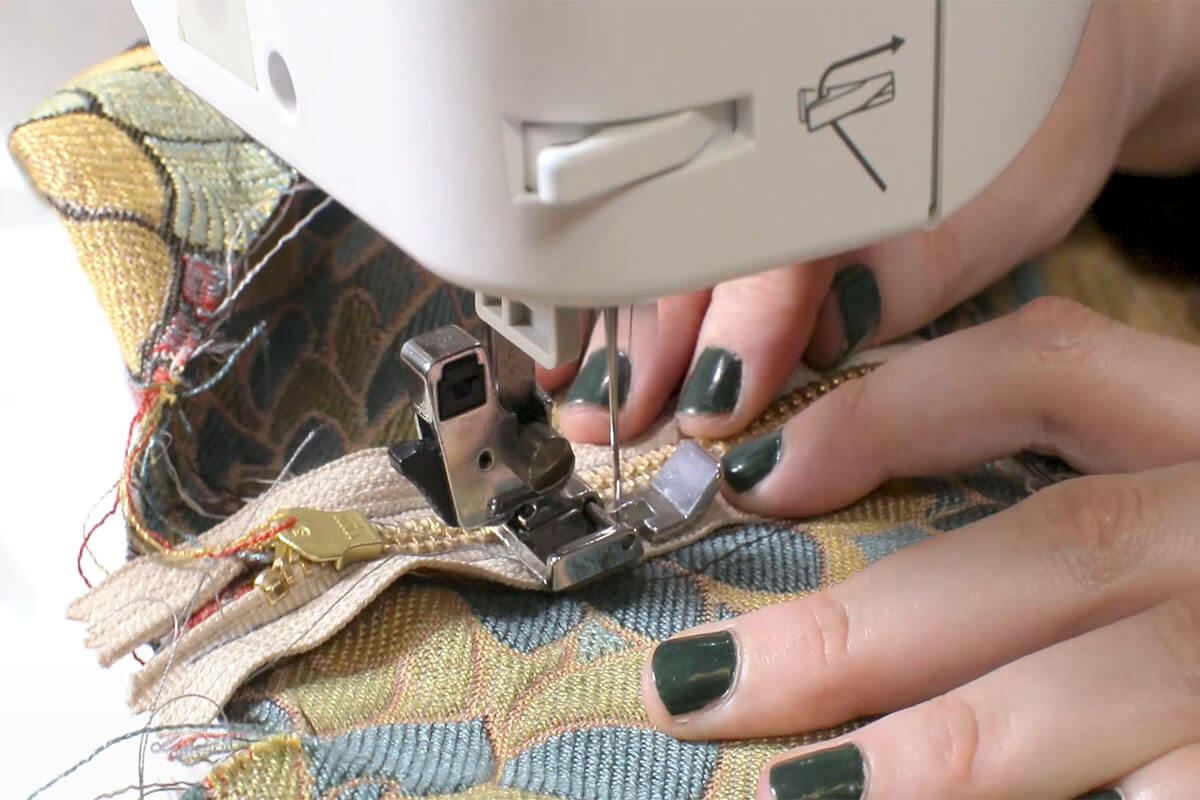
Using a zipper foot, sew 1/8” away from the zipper on both sides.
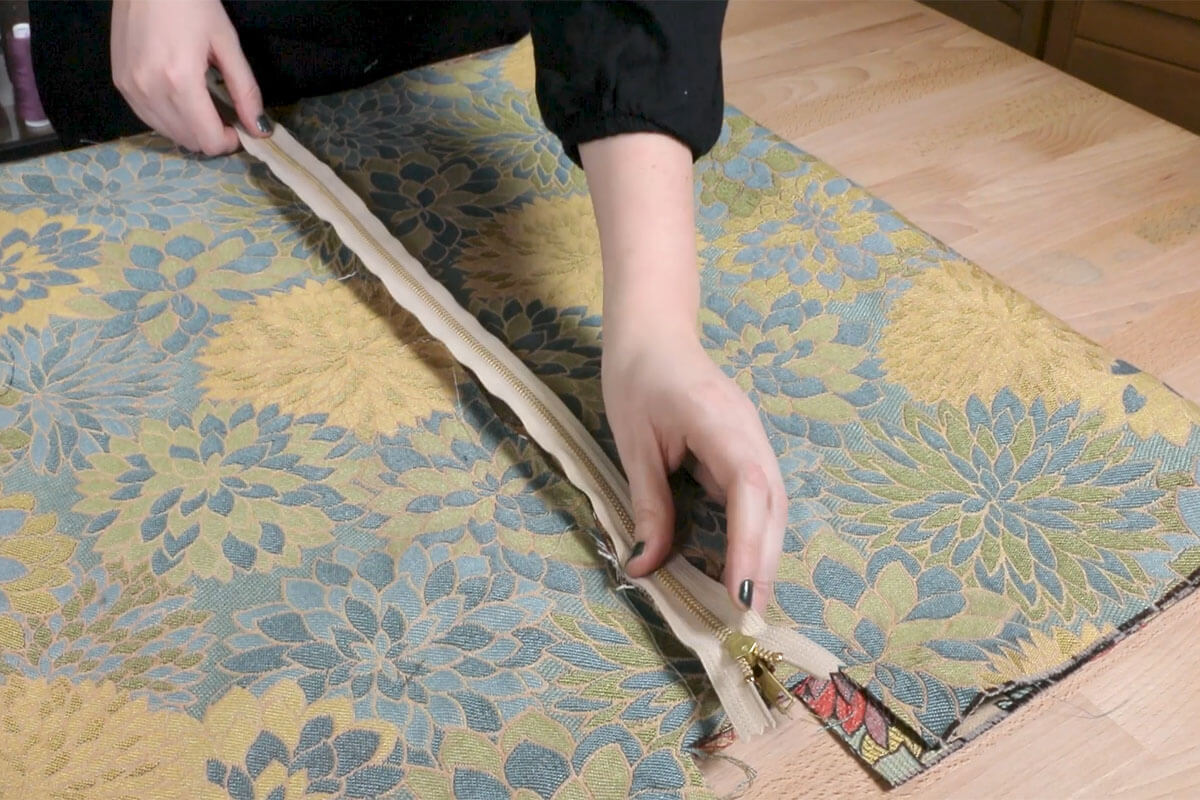
Use a seam ripper to tear out the first seam on the front to reveal the zipper.
Open the zipper so when the time comes, you are able to flip your cushion right side out.
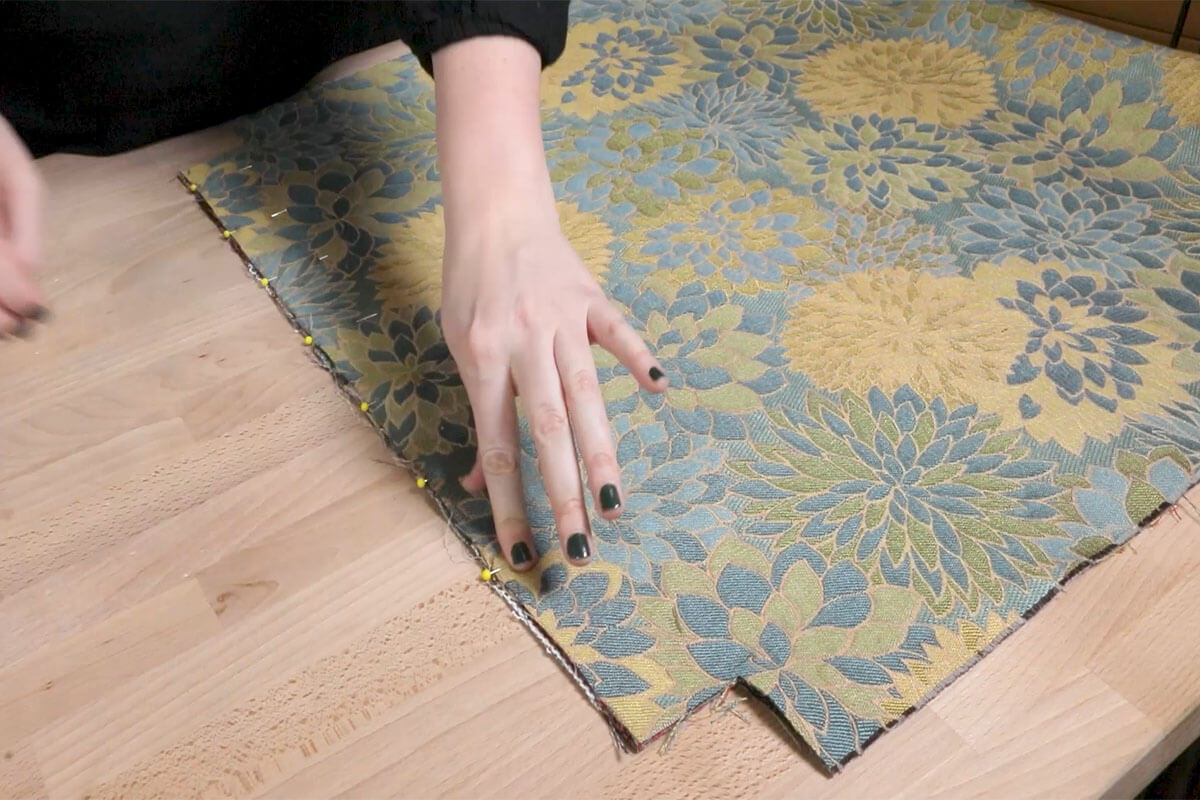
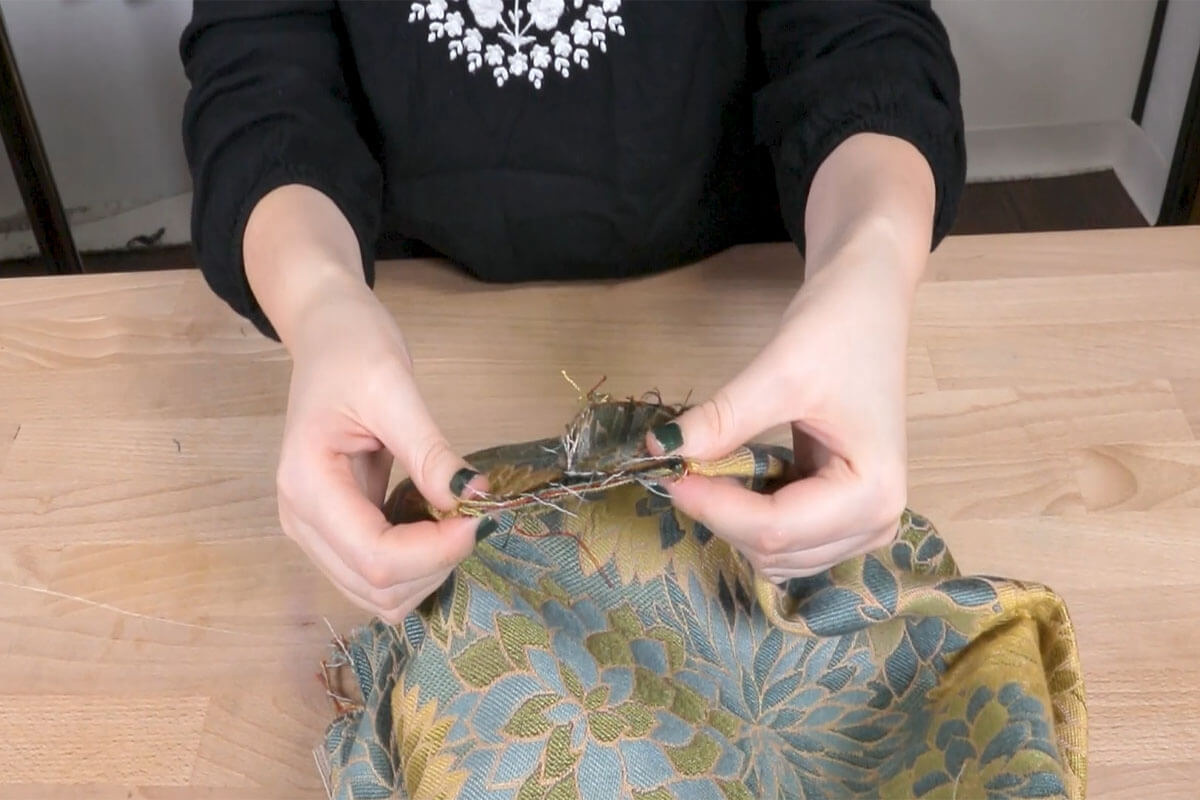
Step 4: Sew Together
Pin and sew up the open sides of your cushion but do not touch the gussets yet.
Now take your gussets and lay them out flat. With your seam centered on the gusset, pin and sew these areas closed.
Do the same for the end with the zipper.
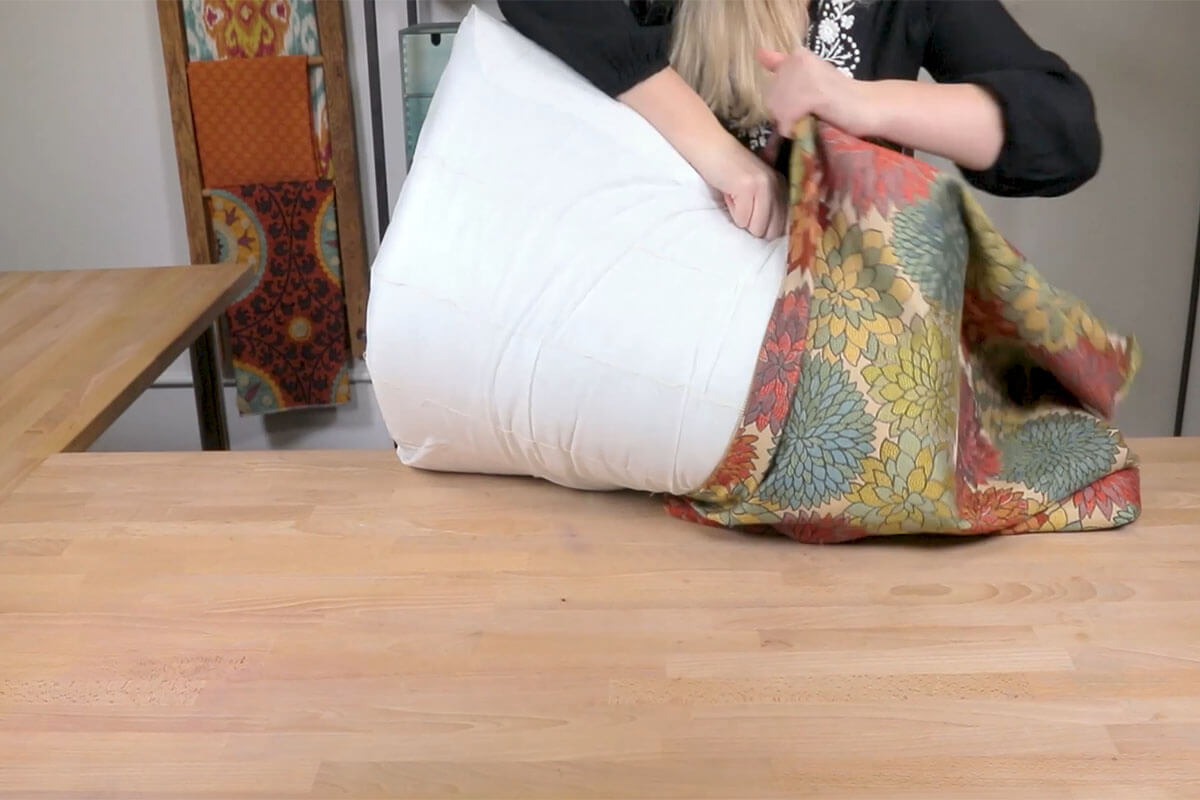
Step 5: Flip and Stuff
Flip the cushion right side out through the zipper opening and stuff the foam inside. Make sure that all the padding is laying flat and the corners are properly pushed out.